Well, the experiments I was running concerning the water/flour ratio, were consistently producing the same results (or near enough that the criteria I was working with wasn't greatly affected). However, what I did notice was that a water/flour ratio above 0.7 resulted in pizza dough that was hard to work with. I was constantly having to flour it and apply fresh cornmeal to prevent it from sticking to the counter while forming the shell as well as sticking to the peel while assembling the pizza toppings.
The bread on the other hand, does not need to be worked, so stickiness does not factor into it. A higher ratio would be possible without any added difficulty. However, there did come a point where the the bread no longer grew larger (lower ratios had a smaller loaf produced). Luckily for ease of the math involved, this also occurred around the 0.7 ratio mark as well.
All of this combined, has led me to believe, that my maximum water ratio is 7 parts water and 10 parts flour, both by mass.
My next task is to expand on this. Since varying the water didn't enhance the flavours (probably because water isn't flavourful...) is to vary the liquid I use. My current experiments are with substituting some of the water with milk. I chose milk because of its fat content which in theory will help add flavour, I had originally wanted to test oils and butter, which are both fats. But the ease of using milk called to me and overruled my better judgement. I have started with a ratio of 1:1 (1 part water and 1 part milk). I should find out how this turns out in a few days once the dough has fully matured. I don't knead bread right now (pun intended), but I will be wanting pizza. So my experiment is continuing there.
Sunday, April 8, 2012


Monday, February 27, 2012
Potatoe Wedges
So, not to let the other starches feel left out, I made potatoe wedges for supper tonight. Not shown is the Honey Dill sauce that accompanied this meal.


Monday, February 20, 2012
Bread and Pizza
Well, I cooked the bread today, followed immediatly by the pizza. Both turned out exceptionally well. As you will remember, these were the 0.700 ratio doughs. I will move onto the 0.750 dough later this week.


Sunday, February 19, 2012
Bread
I have recently started making my own bread again (my old loaves were never that great, so I stopped work on them). The reason for starting again is my experiments with pizza dough. I noticed all the big bubbles that formed in the dough while it was rising in the fridge (The higher mositure doughs I made in the past). I was always anoyed when I made the pizza crusts, all those bubbles were destroyed and I never got to taste them. How wonderful it would be in a bread loaf! But alas, taking it out and shaping it into a loaf would damage the bubbles and they would never fully recover, even after allowing to rise again.
Enter my stroke...of genius! Make the dough, place it in a loaf pan, cover with plastic wrap and let it rise in the fridge before baking. BRILLIANCE!
I was concerned at first about putting cold dough directly into a preheated oven, so the first experiment (which I am keeping lock stepped to my pizza dough tests), with a ratio of 0.667 was allowed to sit out at room temperature for about an hour before baking. I preheated the oven to 400ºF and cooked for 10 minutes before reducing the temperature to 350ºF for a another half hour. No washes or steam was added before, during or after cooking.
When it came out it looked a little dark, which made me fearful of how the loaf would taste. Luckily when I ate the first slice I was relieved, it tasted great! It was also a tough bread, something I definetly enjoy. However it did tend to stick to the loaf pan.
The second loaf (again lock stepped) was 0.650 and to avoid the sticking issue, I placed the doughin a silicone loaf pan that I have to rise. This one I took straight from the fridge into the oven, without any noticeable difference in the final product. When it was cooking, I could faintly smell silicone, so I am wary of trying the pan again. However when I unmolded it, it had an awesome texture and did not stick at all. After some trepidation as to whether I should try some or not (after all I did smell silicone while baking), I tried it. I was expecting a silicone taste, which was lacking. I can happily say that I have nearly eaten the whole loaf, and it was delicious all the way through.
There was a problem with both loaves though, the water ratio wasn't high enough to create the really big bubbles that I want, so the loaves were slightly denser than I want. This problem should go away as I increase the ratio. While this ratio seems to be working well for pizza dough (so far), it isn't quite cutting it for bread.
The current loaf is at 0.700 (again lock stepped) and is currently rising in the metal loaf pan I started with. This time I lightly greased it with some olive oil.
Enter my stroke...of genius! Make the dough, place it in a loaf pan, cover with plastic wrap and let it rise in the fridge before baking. BRILLIANCE!
I was concerned at first about putting cold dough directly into a preheated oven, so the first experiment (which I am keeping lock stepped to my pizza dough tests), with a ratio of 0.667 was allowed to sit out at room temperature for about an hour before baking. I preheated the oven to 400ºF and cooked for 10 minutes before reducing the temperature to 350ºF for a another half hour. No washes or steam was added before, during or after cooking.
When it came out it looked a little dark, which made me fearful of how the loaf would taste. Luckily when I ate the first slice I was relieved, it tasted great! It was also a tough bread, something I definetly enjoy. However it did tend to stick to the loaf pan.
The second loaf (again lock stepped) was 0.650 and to avoid the sticking issue, I placed the doughin a silicone loaf pan that I have to rise. This one I took straight from the fridge into the oven, without any noticeable difference in the final product. When it was cooking, I could faintly smell silicone, so I am wary of trying the pan again. However when I unmolded it, it had an awesome texture and did not stick at all. After some trepidation as to whether I should try some or not (after all I did smell silicone while baking), I tried it. I was expecting a silicone taste, which was lacking. I can happily say that I have nearly eaten the whole loaf, and it was delicious all the way through.
There was a problem with both loaves though, the water ratio wasn't high enough to create the really big bubbles that I want, so the loaves were slightly denser than I want. This problem should go away as I increase the ratio. While this ratio seems to be working well for pizza dough (so far), it isn't quite cutting it for bread.
The current loaf is at 0.700 (again lock stepped) and is currently rising in the metal loaf pan I started with. This time I lightly greased it with some olive oil.
Pizza Dough
I have been working on the dough for two weeks now. Unlike my cheese fiasco, I am being much more careful with the dough. To that extent I am trying different flour to water ratios, the only quantity I am changing is water; Nothing else is changing. The recipe has been reduced to:
600 grams Flour
1 tbls Sugar, Salt and Yeast
X grams Water
I am measuring the flour and water to the nearest gram. This is important, because the water is changing by as little as 10 grams per test, so a gram off from what I want to test would create a large difference. You will also note that I have removed the fat from the recipe. Gone for now is the 2 tbls of olive oil or butter I used to add.
As for the procedure, I am mixing all of the dry ingredients in the mixer bowl while on top of the scale, I am then adding filtered cold water. I use my stand mixer to knead the dough until it separates from the sides of the bowl. However in the future, as I increase the water content, I will need a different criteria for knowing the dough is "done". From here I put it into a bowl and cover with saran wrap and put it in the fridge for 2-3 days. The dough will rise and become spongy during this time. The dough is taken out and can be used for three pizza crusts. The oven is preheated to 500 ºF with a pizza stone and then allowed to sit for roughly half an hour before baking (I used to start baking as soon as it was preheated). It isn't removed until the cheese is showing signs of browning (~10 minutes).
I started the test with a 1:2 water to flour ratio (0.667), this has been my basic dough ratio for awhile now. The dough came out nice and flavourful, it browned nicely in the oven where it was touching the stone and developed a few big bubbles (3-4 cm above the average top).
The next test was the 13:20 (0.650) which turned out very similarly. This was mix up, I had intended on increasing the ratio, but I was destracted by something shiney. There was no noticeable difference, both of the doughs were moist and tacky to the touch, but not sticky. Both tasted great.
The current test, which I just finished making is 7:10 (0.700). I have high hopes for this one.
In the future, I am going to increase the ratio by 0.050 until I believe I have over shot my optimal ratio, at which point I will start doing a successive approximation strategy until I find the ratio I like the most.
I forgot to mention that, for consistency sake, I am spraying the top of the dough down with olive oil (a light coating), I'm using pureed reduced salsa for the sauce, 28MF%/42% moisture mozzarella cheese and red pepper topping (placed under the layer of cheese). To prevent sticking to the peel, I am using a dusting of cornmeal.
600 grams Flour
1 tbls Sugar, Salt and Yeast
X grams Water
I am measuring the flour and water to the nearest gram. This is important, because the water is changing by as little as 10 grams per test, so a gram off from what I want to test would create a large difference. You will also note that I have removed the fat from the recipe. Gone for now is the 2 tbls of olive oil or butter I used to add.
As for the procedure, I am mixing all of the dry ingredients in the mixer bowl while on top of the scale, I am then adding filtered cold water. I use my stand mixer to knead the dough until it separates from the sides of the bowl. However in the future, as I increase the water content, I will need a different criteria for knowing the dough is "done". From here I put it into a bowl and cover with saran wrap and put it in the fridge for 2-3 days. The dough will rise and become spongy during this time. The dough is taken out and can be used for three pizza crusts. The oven is preheated to 500 ºF with a pizza stone and then allowed to sit for roughly half an hour before baking (I used to start baking as soon as it was preheated). It isn't removed until the cheese is showing signs of browning (~10 minutes).
I started the test with a 1:2 water to flour ratio (0.667), this has been my basic dough ratio for awhile now. The dough came out nice and flavourful, it browned nicely in the oven where it was touching the stone and developed a few big bubbles (3-4 cm above the average top).
The next test was the 13:20 (0.650) which turned out very similarly. This was mix up, I had intended on increasing the ratio, but I was destracted by something shiney. There was no noticeable difference, both of the doughs were moist and tacky to the touch, but not sticky. Both tasted great.
The current test, which I just finished making is 7:10 (0.700). I have high hopes for this one.
In the future, I am going to increase the ratio by 0.050 until I believe I have over shot my optimal ratio, at which point I will start doing a successive approximation strategy until I find the ratio I like the most.
I forgot to mention that, for consistency sake, I am spraying the top of the dough down with olive oil (a light coating), I'm using pureed reduced salsa for the sauce, 28MF%/42% moisture mozzarella cheese and red pepper topping (placed under the layer of cheese). To prevent sticking to the peel, I am using a dusting of cornmeal.
PIZZA!
Well I am back to experimenting with pizza. For now I have putoff testing the chemical leavener in favour of experimenting with other factors. The only things you can really change on a pizza are:
1) Dough
2) Sauce
3) Cheese
4) Toppings
I recently went through the cheese phase (which I will have to go through again). I tried Provolone and Havarti (under recommendation from a cheese monger, err I mean retailer). While good, the cost increase with both compared to Mozzarella was a little prohibitive compared to the flavour imparted. That, and Havarti is hard to shred! I went back to mozzarella, broken and defeated until I realized that Mozzarella comes in multiple different types. The majour differences are the moisture content and milk fat content (As far as I was able to find out, please correct me if I'm wrong).
There were noticiable differences between each cheese, but the two main criteria I selected that I wanted to optimize for was stringyness (I like some, but not a lot) and browning (browned mozzarella tastes much better). This experiment failed, mainly because I didn't cook them side by side or one right after another. I didn't take pictures, and I wrote a quick note on the qualities. There were no real controls and the criteria was entirely objective, no measurments at all. So alas, dear reader, I can't tell you the optimal values for a non-stringy, nicely browning cheese. What did come of this experiment though was a reduction in the amount of cheese I use, I found that I enjoyed the crust with minute amounts of cheese more than the solid sheet in the center. I am still working on finding the optimal cheese amounts.
1) Dough
2) Sauce
3) Cheese
4) Toppings
I recently went through the cheese phase (which I will have to go through again). I tried Provolone and Havarti (under recommendation from a cheese monger, err I mean retailer). While good, the cost increase with both compared to Mozzarella was a little prohibitive compared to the flavour imparted. That, and Havarti is hard to shred! I went back to mozzarella, broken and defeated until I realized that Mozzarella comes in multiple different types. The majour differences are the moisture content and milk fat content (As far as I was able to find out, please correct me if I'm wrong).
There were noticiable differences between each cheese, but the two main criteria I selected that I wanted to optimize for was stringyness (I like some, but not a lot) and browning (browned mozzarella tastes much better). This experiment failed, mainly because I didn't cook them side by side or one right after another. I didn't take pictures, and I wrote a quick note on the qualities. There were no real controls and the criteria was entirely objective, no measurments at all. So alas, dear reader, I can't tell you the optimal values for a non-stringy, nicely browning cheese. What did come of this experiment though was a reduction in the amount of cheese I use, I found that I enjoyed the crust with minute amounts of cheese more than the solid sheet in the center. I am still working on finding the optimal cheese amounts.
Tuesday, October 11, 2011
Eggs Benedict
Well, I recently discovered that I can make and eat Eggs Benedict every day, or at least most days. However, like all things, I change and modify how and what I do to make it. For instance I prefer to use a fried egg (over easy) instead of a poached egg.
The toughest part I found is reviving the Hollandaise sauce that I have stored in the fridge. So far it still doesn't come out as nice as fresh made, but I have learned a few things. The first is low heat, heck, I don't even turn the heat on the stove on, I use the residual heat from frying the bacon and eggs, and even then, it's only on that element for around 30 seconds. Just to warm it up a little.
The toughest part I found is reviving the Hollandaise sauce that I have stored in the fridge. So far it still doesn't come out as nice as fresh made, but I have learned a few things. The first is low heat, heck, I don't even turn the heat on the stove on, I use the residual heat from frying the bacon and eggs, and even then, it's only on that element for around 30 seconds. Just to warm it up a little.
Saturday, October 1, 2011
Saturday Brunch
So far, I have hosted three Saturday morning brunches, the first two I served waffles. The only condition applied to the participants was to be there on time and to bring a topping of their choice. The first event was a flop, people showed up whenever, but more importantly didn't bring any toppings. Needless to say, my Blueberry syrup was taxed to the max and I was left with none (bummer).
The second event went off much better. People were more on time and everyone brought a topping. We had Nutella, blueberry pie filling, my blueberry syrup, some Aunt Jemimas syrup (never got opened) and few other things. All in all, much more of a successful event.
Today, however I changed the menu around, instead of waffles and bring your own topping, it was Eggs Benedict and show up and eat it. This went well, everyone enjoyed it, and it was a great get together. However, from my side of the story, it wasn't so great. I was in the kitchen the entire time, toasting English muffins, cooking bacon (Pork and Turkey), poaching eggs and assembling the "Bennies", while simultaneously bring the goods out to people to enjoy. I didn't mind this at the time, but in retrospect, it was a social engagement that I wasn't attending, I was merely at it. So as a brunch idea, it is great, but I need to find away of engaging others into the cooking process (kinda hard as my new kitchen is smaller and more cutoff from the rest of my apartment) or prepare everything (or mostly everything) in advance and keep it warm in the oven. That way I can spend more time with my guests, instead of on the periphery making them food. Waffles work better in this sense, because I can bring the iron out to the living room and the waffles can cook right there, in the middle of the group.
The second event went off much better. People were more on time and everyone brought a topping. We had Nutella, blueberry pie filling, my blueberry syrup, some Aunt Jemimas syrup (never got opened) and few other things. All in all, much more of a successful event.
Today, however I changed the menu around, instead of waffles and bring your own topping, it was Eggs Benedict and show up and eat it. This went well, everyone enjoyed it, and it was a great get together. However, from my side of the story, it wasn't so great. I was in the kitchen the entire time, toasting English muffins, cooking bacon (Pork and Turkey), poaching eggs and assembling the "Bennies", while simultaneously bring the goods out to people to enjoy. I didn't mind this at the time, but in retrospect, it was a social engagement that I wasn't attending, I was merely at it. So as a brunch idea, it is great, but I need to find away of engaging others into the cooking process (kinda hard as my new kitchen is smaller and more cutoff from the rest of my apartment) or prepare everything (or mostly everything) in advance and keep it warm in the oven. That way I can spend more time with my guests, instead of on the periphery making them food. Waffles work better in this sense, because I can bring the iron out to the living room and the waffles can cook right there, in the middle of the group.
Apple Cider
I made the cider last week, but haven't gotten around to posting it until now... oops my bad.
After all was said and done, I had 500 grams of coarse pulp, 500 grams of fine pulp (first straining vs second straining, there was a distinct difference between them) and 2.5 liters of Apple Cider.
I had intended on spicing it by tossing in a cinnamon stick and some clove berries. But unfortunately I forgot about it until about 2 minutes into the canning process. I could have removed the jars and broken the seal. Though I wasn't sure if I would be able to use the lids again (One use only, they may not seal properly the second time and their dirt cheap). I didn't want to waste the lids so I just left them in the water until they were done being processed. Oh well, maybe next year.
The following is pictures of the haul this year.
After all was said and done, I had 500 grams of coarse pulp, 500 grams of fine pulp (first straining vs second straining, there was a distinct difference between them) and 2.5 liters of Apple Cider.
I had intended on spicing it by tossing in a cinnamon stick and some clove berries. But unfortunately I forgot about it until about 2 minutes into the canning process. I could have removed the jars and broken the seal. Though I wasn't sure if I would be able to use the lids again (One use only, they may not seal properly the second time and their dirt cheap). I didn't want to waste the lids so I just left them in the water until they were done being processed. Oh well, maybe next year.
The following is pictures of the haul this year.
 |
| ALL of these apples were from one tree in the city (the only tree to bear fruit for me) |
 |
| These are all of the apples from my parents tree |
 |
| 5x500 mL jars were the total cider haul this year |
 |
| Hard (course) pulp and Soft (fine) pulp, about 500 g each |
 |
| Better lighting in this picture of the apple cider |
 |
| Side shot to show the opacity of the juice! |
Wednesday, September 21, 2011
Pizza experiment
Today I made a double recipe of pizza dough. This should be good for four pizzas total. I was hungry today, so I made one of them for supper, but as usual I put the rest in the fridge where it will stay until I use it. From casual reading of the Joy of Cooking, I believe this to be a variant of a sponge starter. Either way it takes bland dough to great dough!
As for the experiment I was doing today. The hurdle I am trying to overcome is the dough not rising as much as I would like while it is cooking. It is still fluffed up, but.... not as much as I want. I hit on my potential solution while talking to a friend about frozen pizza and the "rising crust pizza" came to mind. I instantly saw a potential solution, that is, to use chemical leaveners to supplement the yeast. I added 1 tablespoon of baking powder to my double recipe.
However, I unfortunately changed two things in my recipe by accident and botched the execution. I forgot the addition of 4 tablespoons of oil (I used to use olive oil, but now am working with butter) to the dough. As for how I botched the baking powder experiment, I forgot to add it to the dough before kneading it. I had finished when I remembered, so I quickly kneaded in a tablespoon. This means that it is probably poorly distributed and is not a good indication of whether I need to increase or decrease the amount added to the recipe.
All in all, the pizza I made tonight tasted great, and there is enough for leftovers for tommorows lunch.
As for the experiment I was doing today. The hurdle I am trying to overcome is the dough not rising as much as I would like while it is cooking. It is still fluffed up, but.... not as much as I want. I hit on my potential solution while talking to a friend about frozen pizza and the "rising crust pizza" came to mind. I instantly saw a potential solution, that is, to use chemical leaveners to supplement the yeast. I added 1 tablespoon of baking powder to my double recipe.
However, I unfortunately changed two things in my recipe by accident and botched the execution. I forgot the addition of 4 tablespoons of oil (I used to use olive oil, but now am working with butter) to the dough. As for how I botched the baking powder experiment, I forgot to add it to the dough before kneading it. I had finished when I remembered, so I quickly kneaded in a tablespoon. This means that it is probably poorly distributed and is not a good indication of whether I need to increase or decrease the amount added to the recipe.
All in all, the pizza I made tonight tasted great, and there is enough for leftovers for tommorows lunch.
Tuesday, September 20, 2011
Apple Cider Preparation
It's that time of the year again, though the dry hot year has reduced the number and size of apples I am collecting this year, I am still making Apple Cider. To make up for the lean year, I have acquired access to another apple tree. A friend of mine bought a house with an apple tree, and they have no way of using all of the apples. Enter me, the friendly neighborhood apple acquirer-er. All for the low cost of two Apple pies (which admittedly I had to talk them into, they were just happy to have some one to take their apples!)
As this was a leaner year and the apples are smaller, I am hoping, that the flavours of the apples will be more intense (though that isn't based on empirical evidence, its just a hope. One that I hope pans out)
Work begins this weekend. I am hoping to have finished collecting apples by Friday from my other sources. Saturday morning I hope to strip mine the new tree, and by the afternoon I hope to be smelting the apples into apple pulp (not to be confused with apple sauce, I wring all the juice out!) and apple cider.
This year I hope to make some Spiced Apple Cider, and as usual, can it all to be enjoyed throughout the coming year.
Fun Fact: Apparently, from my searching of the Inter-Webs, Apple Cider is just unrefined, unstrained and/or unpasteurized apple juice. From here, the Cider undergoes one of the following pathways. Sold as Apple Cider (which has a shorter life span if it is true Cider), it can also be spiced with cinnamon, cloves, or other seasonal spices for Spiced Apple Cider, it can be fermented for Mulled Apple Cider, or as the bulk of it goes, refined into Apple Juice. The refining typically pasteurizes it, but most importantly it removes all of the floating bits, leaving the crisp, golden colour that we are used to seeing.
As this was a leaner year and the apples are smaller, I am hoping, that the flavours of the apples will be more intense (though that isn't based on empirical evidence, its just a hope. One that I hope pans out)
Work begins this weekend. I am hoping to have finished collecting apples by Friday from my other sources. Saturday morning I hope to strip mine the new tree, and by the afternoon I hope to be smelting the apples into apple pulp (not to be confused with apple sauce, I wring all the juice out!) and apple cider.
This year I hope to make some Spiced Apple Cider, and as usual, can it all to be enjoyed throughout the coming year.
Fun Fact: Apparently, from my searching of the Inter-Webs, Apple Cider is just unrefined, unstrained and/or unpasteurized apple juice. From here, the Cider undergoes one of the following pathways. Sold as Apple Cider (which has a shorter life span if it is true Cider), it can also be spiced with cinnamon, cloves, or other seasonal spices for Spiced Apple Cider, it can be fermented for Mulled Apple Cider, or as the bulk of it goes, refined into Apple Juice. The refining typically pasteurizes it, but most importantly it removes all of the floating bits, leaving the crisp, golden colour that we are used to seeing.
Monday, September 19, 2011
Reheated Lasagna lunch
I recently made a vegetarian lasagna (I like meat as much as the next person, but I've had lots of good meat Lasagnas, but never a great one, while I have hat lots of great meatless ones). Nothing special, I tried a few new things and it turned out really well. Probably one of the best ones I've made recently. But those are trivial details compared to how I have discovered how to reheat it for lunches!
My problem was that, Lasagna, doesn't do very well in the microwave for reheating (or at least mine doesn't). It gets soggy and for some reason the cheese doesn't melt, it runs. It still tasted great, but reheated Lasagna is never the same as fresh cooked. Some foods do well reserved, Pizza can be reserved cold or reheated and lose very little of the original "wham, this is good!" This really bothered me, and I wasn't fully enjoying the meal, or at least as much as I could. So, as I had a few lunches that I could experiment with, I did some experiments.
At work I have access to a toaster oven, which does all of the typical toaster oven functions. Toasts, broils and goes up to 450 ºF. But fortunately, it is not located in the lunch room where I eat (rather it is relatively close to my desk, which is where I don't eat, but rather where I work before eating), and the containers that I transport the food to work are plastic, which unfortunatly means that for that "just melted" cheese taste, I need to get some of that freshly melted plastic taste and smell.
My solution? I lined my container with foil! Now don't think I shoved the plastic container wrapped in foil into the toaster oven, 'cause that would be stupid. I would have melted plastic on my foil enclosing my Lasagna, not a tasty combination. I instead removed the foil liner with the Lasagna in it, and placed that in the toaster oven near my desk for 15-20 minutes. I initially tried 350 ºF, but quickly found out that that was too high of a heat and some of the cheese started charring a little ( I noticed it before the charring led to a bad taste, which, is a fine line between good tasting charred and bad tasting burnt). I then turned the temperature down to 200 ºF and let it sit there until I was ready to go for lunch. I grabbed the foil out of the oven and back into the plastic container and headed up to the lunch room.
When I started to eat the Lasagna, it was like eating it straight out of the oven again, there were crispy parts, a nice browning on the cheese, the layers were well heated and not soggy. I was in reheated lunch heaven.
The problem with this in general is that, I am lucky enough to have a toaster oven conveniently close to me that I can shove food in before I go for lunch. So I can keep a semi-close eye on it while I work before going for lunch. I imagine for most people that this isn't the case. For those of you out in Internet land that only have the toaster oven in the lunch room, or worse yet, only a microwave. The only thing I can say is, I'm sorry for your loss, but if you can solve the reheating problem, then I would be more than happy to hear from you.
My problem was that, Lasagna, doesn't do very well in the microwave for reheating (or at least mine doesn't). It gets soggy and for some reason the cheese doesn't melt, it runs. It still tasted great, but reheated Lasagna is never the same as fresh cooked. Some foods do well reserved, Pizza can be reserved cold or reheated and lose very little of the original "wham, this is good!" This really bothered me, and I wasn't fully enjoying the meal, or at least as much as I could. So, as I had a few lunches that I could experiment with, I did some experiments.
At work I have access to a toaster oven, which does all of the typical toaster oven functions. Toasts, broils and goes up to 450 ºF. But fortunately, it is not located in the lunch room where I eat (rather it is relatively close to my desk, which is where I don't eat, but rather where I work before eating), and the containers that I transport the food to work are plastic, which unfortunatly means that for that "just melted" cheese taste, I need to get some of that freshly melted plastic taste and smell.
My solution? I lined my container with foil! Now don't think I shoved the plastic container wrapped in foil into the toaster oven, 'cause that would be stupid. I would have melted plastic on my foil enclosing my Lasagna, not a tasty combination. I instead removed the foil liner with the Lasagna in it, and placed that in the toaster oven near my desk for 15-20 minutes. I initially tried 350 ºF, but quickly found out that that was too high of a heat and some of the cheese started charring a little ( I noticed it before the charring led to a bad taste, which, is a fine line between good tasting charred and bad tasting burnt). I then turned the temperature down to 200 ºF and let it sit there until I was ready to go for lunch. I grabbed the foil out of the oven and back into the plastic container and headed up to the lunch room.
When I started to eat the Lasagna, it was like eating it straight out of the oven again, there were crispy parts, a nice browning on the cheese, the layers were well heated and not soggy. I was in reheated lunch heaven.
The problem with this in general is that, I am lucky enough to have a toaster oven conveniently close to me that I can shove food in before I go for lunch. So I can keep a semi-close eye on it while I work before going for lunch. I imagine for most people that this isn't the case. For those of you out in Internet land that only have the toaster oven in the lunch room, or worse yet, only a microwave. The only thing I can say is, I'm sorry for your loss, but if you can solve the reheating problem, then I would be more than happy to hear from you.
Sunday, September 18, 2011
Funeral Potatoes
There are very few meals that I seem to gorge myself on. The two that come to mind are my mothers Honey Garlic Ribs on Rice (something I have no problem making on my own) and her Funeral Potatoes. My aunts and make them just as well as my mother, but every time I try to make them, even following the same recipe, I fall very short of the mark.
Now I know what your thinking, Funeral Potatoes? What am I doing eating this on a semi-regular basis? Well, a long story short, I've heard this dish called by a number of names, but Funeral Potatoes is what I call it because I liked the name. No I'm not morbid or anything, I just thought it to be a fun name to give to something I enjoy so much. My Aunts and mother all call it a potatoe casserole, but whatever you call it, it is delicious!
All it really is, is hashbrowns in a cheese sauce with buttered cornflakes crushed on top.
You would think that something so simple sounding could be made by anyone! But apparently I am not in that grouping.
Either way, whenever I visit my family and Funeral Potatoes make an appearance on the dinner table, I either finish them all off (which is harder to do now that my Mom has been making more for the meal), or I end up taking a doggy bag home with me. They aren't as good when reheated for a lunch, but they still get ranked really high up on the list of favorite lunches.
Now I know what your thinking, Funeral Potatoes? What am I doing eating this on a semi-regular basis? Well, a long story short, I've heard this dish called by a number of names, but Funeral Potatoes is what I call it because I liked the name. No I'm not morbid or anything, I just thought it to be a fun name to give to something I enjoy so much. My Aunts and mother all call it a potatoe casserole, but whatever you call it, it is delicious!
All it really is, is hashbrowns in a cheese sauce with buttered cornflakes crushed on top.
You would think that something so simple sounding could be made by anyone! But apparently I am not in that grouping.
Either way, whenever I visit my family and Funeral Potatoes make an appearance on the dinner table, I either finish them all off (which is harder to do now that my Mom has been making more for the meal), or I end up taking a doggy bag home with me. They aren't as good when reheated for a lunch, but they still get ranked really high up on the list of favorite lunches.
Saturday, December 4, 2010
Perogies
My mom used to make perogies when I was younger, but as my brother, sister and I grew, I assume we ate more and more and my Mom ended up not making them anymore. The store bought ones were ok and I lived on them for years thinking they were pretty good, that is until I tried some of my Aunts. For years after I could still remember the authentic taste, but I never tried to make any for fear that the task would be too big of an undertaking.
Well, that ended today, when my room mate, his girlfriend and his mother all came by to make Perogies for a Christmas party. It took us a few hours, but we were able to get a total of roughly 13 dozen made!

We used a biscuit cutter to cut out rounds of the dough we had made.
 The potatoe and onion mixture was conveniently rolled into balls so that it would be easier to work with.
 Behold, my creations! Oh and everyone else helped... This photo was taken long before we were finished, so imagine this but many more.
Well, that ended today, when my room mate, his girlfriend and his mother all came by to make Perogies for a Christmas party. It took us a few hours, but we were able to get a total of roughly 13 dozen made!

We used a biscuit cutter to cut out rounds of the dough we had made.


Thursday, November 25, 2010
How to Crack an Egg - Revisited
In response to a post I made awhile back, about how to crack an egg. I have received some comments about how it does not work as I explained. How egg shell still manages to get into the bowl. Thinking about this has made me consider some points. The first being, "did I describe the procedure differently than I actually perform it?", the next being "Or maybe I'm just superbly gifted at cracking eggs!".
Well I analyzed what I had written and compared it with what I do. The two I believe are still compatible, so my problem became, how to I articulate my words to better describe the act of cracking an egg. I've tried words, heck I've tried pictures, which as we all know is worth a thousand words AND is a fact. This led me to the next logical format, video. So, "Behold, my creations!"
First, let me apologize for the stuttering sound in the videos, that is the auto focus doing its bit to be annoying. During the making of the videos, I went through several takes. The problem was not with the actual cracking of the eggs, but rather with holding a video camera AND cracking an egg with both hands, all without the aid of a tripod... I spent way too much time focusing on the camera and not what I was doing in the first two videos and the performance looked terribly amateur, especially since I forgot to turn it off and recorded some extra footage in the first one. The third video was a progression away from that and more towards actually paying attention to what I was doing. The last video (also the only video I'm willing to admit exists, the others are fakes, honestly...) I paid attention entirely to the egg. The theme across all of the videos though, is that of the seven eggs I cracked, not one left any shells in the bowl.
Well I analyzed what I had written and compared it with what I do. The two I believe are still compatible, so my problem became, how to I articulate my words to better describe the act of cracking an egg. I've tried words, heck I've tried pictures, which as we all know is worth a thousand words AND is a fact. This led me to the next logical format, video. So, "Behold, my creations!"
First, let me apologize for the stuttering sound in the videos, that is the auto focus doing its bit to be annoying. During the making of the videos, I went through several takes. The problem was not with the actual cracking of the eggs, but rather with holding a video camera AND cracking an egg with both hands, all without the aid of a tripod... I spent way too much time focusing on the camera and not what I was doing in the first two videos and the performance looked terribly amateur, especially since I forgot to turn it off and recorded some extra footage in the first one. The third video was a progression away from that and more towards actually paying attention to what I was doing. The last video (also the only video I'm willing to admit exists, the others are fakes, honestly...) I paid attention entirely to the egg. The theme across all of the videos though, is that of the seven eggs I cracked, not one left any shells in the bowl.
Wednesday, November 17, 2010
Juicing Citrus Fruit
In the past I have heard that microwaving a citrus fruit before juicing would allow you to get more juice out of it. After a little research, I found a plausible explanation for this, the microwaves break down the cell membranes so that the juices are able to flow more freely. I accepted this as fact until I read elsewhere that warming the fruit in the oven for a few minutes would have the same effect.
This made me suspicious, maybe it wasn't the breaking down of the cell walls, but rather, just the heat was somehow releasing the juices. All of this started to make me think, the information on the internet was sketchy, only claiming I would get more juice, never how it worked or even how much more I would get.
At this point, I realized that I would be hard pressed to discover how it worked on my own, so that question is still somewhat of a mystery to me. However, testing to see how much more juice I could get was a very easy and simple process.
For the purposes of this experiment I did not try the oven method, only because the information I could find on it said it took a few minutes, where as the microwave would take a few seconds. As such, if the microwave method worked, I would never bother with the oven method, only because it takes so much longer.
 For this experiment, I gathered two fine citrus specimens (I had planned on adding a Grapefruit and Lime to the line up, but I didn't really want their juices). I am going to talk about the steps I took on the Lemon, they were the same for the Orange, I just didn't photo document it.
 I tried to split the Lemon lengthwise so that each half weighed exactly the same. I came pretty close on the Lemon and almost exactly on the Orange, so I believe it is safe to say I succeeded. I then subjected one half of the Lemon to 10 seconds on Hi in the microwave. I haven't tested with other powers and time spans. I may do this in the future, but I have no plans to do so. The other half I did nothing too.
 I don't have a citrus fruit juicer, so I used the next best thing, the back side of a spoon to juice both halves into pre-weighed custard cups. Using the tare option of my scale, I was able to measure the weight difference between the juice/pulp/seeds of each method. I then strained the juice and measured it separately. The results are shown below.
This made me suspicious, maybe it wasn't the breaking down of the cell walls, but rather, just the heat was somehow releasing the juices. All of this started to make me think, the information on the internet was sketchy, only claiming I would get more juice, never how it worked or even how much more I would get.
At this point, I realized that I would be hard pressed to discover how it worked on my own, so that question is still somewhat of a mystery to me. However, testing to see how much more juice I could get was a very easy and simple process.
For the purposes of this experiment I did not try the oven method, only because the information I could find on it said it took a few minutes, where as the microwave would take a few seconds. As such, if the microwave method worked, I would never bother with the oven method, only because it takes so much longer.


Lemon
- Initial Weight of the full Lemon = 172 g
- Microwaved half weighed = 79 g, the Juice and Pulp weighed = 30 g, the Juice alone weighed = 24 g
- Traditional half weighed = 92 g, the Juice and Pulp weighed = 33 g, the Juice alone weighed = 22 g
- Orange
- Initial Weight of the full Orange = 188 g
- Microwaved half weighed = 93 g, the Juice and Pulp weighed = 52 g, the Juice alone weighed = 18 g
- Traditional half weighed = 94 g, the Juice and Pulp weighed = 52, the Juice alone weighed = 13 g
- To break it down, when I Microwaved the Lemon, I was able to get 30.3% by weight as juice, compared to 23.9% when juiced with nothing special done to it. That is an improvement of 6.4% of juice from a Lemon, by microwaving the Lemon for only 10 seconds. Again, I haven't tried other power levels or time spans, so it may get better, or it may get worse. All I can say is that for a Lemon placed in a microwave for 10 seconds on Hi, you can expect to see a 6.4% increase in the volume of juice produced.
As for the Orange, the Microwaved half came out to 19.4% juice and the Traditional method produced 13.8%. Again a net benefit, albeit only a 5.6% increase. As I mentioned with the Lemons, all we can conclude is that you can get more juice my microwaving on Hi for 10 seconds.
The next logical step would be to test multiple power levels and time spans to determine the optimal time and power level to get the most juice from the citrus fruits. You would need multiple samples at each level to create a proper statistical model for this to work. This is my science disclaimer.
- On another note, from the small sample I had, I noticed that the juice weighed 1 gram per 1 milliliter roughly.
Saturday, November 6, 2010
Pumpkin Seeds
Ah yes the humble Pumpkin seed, as far as my history with pumpkin seeds go, I really didn't like them. They were kind of bland tasting and it was like eating little twigs that splintered and got stuck in my teeth. I could only eat one or two before giving up hopelessly as to what other people found to be so great about them. Sunflower seeds on the other hand were more my thing, but even then they had to be shelled before eaten, the pumpkin seed has no easy way of easily shedding its splintery exterior to reveal its flavourful insides to the eagerly awaiting tongue for its delightful flavour. Instead, it sits there, the entirety of its beautiful essence locked away by a barbaric exterior, one that has set up its woody palisade to protect its hidden wonders. Never letting its walls fall for even a second to let me a poor humble petitioner to enjoy the secrets locked within.
Well, I am sad to say, so to have I failed to bring the Pumpkin seed into a realm into which I may enjoy it. The ones I made are still, just as the ones on the market, not enjoyable. However, I was given a complement on them by someone who does enjoy pumpkin seeds, so maybe it is just me who can't enjoy them.
As you all remember, in my last post, I made a Pumpkin Puree out of a whole Pumpkin. I had promised to make a pumpkin bread using both cooked and uncooked puree, that is still in the planning. But at the same time I mentioned that I was soaking the pumpkin seeds in a salt water solution overnight.
 I drained them and spread them out on my custom made non-stick baking sheet (more on that at another time). At this point I still had not cleaned them of the stringy bits that they were webbed in, inside the pumpkin. The soaking had remove most of what had still clung to them. After toasting them at a low oven temperature, the rest fell off. Because they were still wet when I put them on the baking tray, it took a little longer for them to start toasting, but once all the water was gone, they proceeded to toast fairly quickly.
 The final product, a bowlful of lightly salted pumpkin seeds, delicious in every way except for eating. Ok that's a lie, but it is hard work to shell them, so it is slow going but still enjoyable once the shell is gone.
Well, I am sad to say, so to have I failed to bring the Pumpkin seed into a realm into which I may enjoy it. The ones I made are still, just as the ones on the market, not enjoyable. However, I was given a complement on them by someone who does enjoy pumpkin seeds, so maybe it is just me who can't enjoy them.
As you all remember, in my last post, I made a Pumpkin Puree out of a whole Pumpkin. I had promised to make a pumpkin bread using both cooked and uncooked puree, that is still in the planning. But at the same time I mentioned that I was soaking the pumpkin seeds in a salt water solution overnight.


Wednesday, November 3, 2010
Pumpkin Puree
Unlike most children, when I was growing up my Mother did not make Banana Bread for me (unlike all the other kids whose mothers made it for them). Instead my Mom made me something even better, she made Pumpkin Bread. Her recipe, resulted in a very strong flavour, partly, ok entirely because she had doubled the amount of spices the original recipe had called for. For my peers it was way to strong of a taste, but for me, I loved it, I reveled in its flavour. The taste of a single bite always brings warm happy memories.
Like my Mother, I started making the recipe with double the spices called for, I have gotten some people addicted to its strong flavour, some but not all. I've always used canned Pumpkin Puree though, just like my Mom. However, in the spirit of things (its fall and Pumpkins are readily available) I have decided to make this ingredient as well. In addition to Pumpkin Bread, the puree can also be used in pies, muffins, waffles, ice cream and whatever whacky creation I can come up with.
In the spirit of making too much, I can't actually turn a whole Pumpkin into loaves of bread and pies and whatever else suits my fancy all at once. I needed to preserve some of it for later use. I originally decided I was going to can the puree for future use, a relatively simple process now that I've done it a few times. I checked the Ball Blue Book (an excellent guide to home canning) for the specifics of how to deal with canning the pumpkin. To my amazement, it recommended against canning, but instead suggested either dehydration or freezing. Dehydration didn't sound appealing, so I have chosen to freeze my puree.
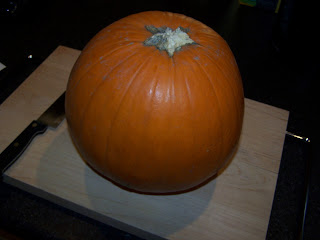 It all began with a pumpkin, there was nothing terribly special about this one, but its mine so I value it more than other pumpkins. I had plans to carve it for Halloween and then turn it into a puree. However I ran out of time and was unable to carve it, that didn't stop me from pureeing it though.
 I started by cutting the pumpkin in half, collecting the seeds and chucking the fibrous strands inside. I set the bowl of seeds off to the side in salt water. The seeds will sit over night and be toasted tomorrow. I hadn't planned on making salted toasted pumpkin seeds, that is until I realized just how many seeds were in a pumpkin (way more than I thought).
 After cooking the shell for almost an hour and a half, I was able to remove the pulp from the skin and puree it with some sugar. It was a messy job, but as I worked I came up with techniques to help the work go faster.
 If I had been planning on canning the puree I would have put more effort into sterilizing the jars. But since I'm freezing them, I just washed them out with warm water. Each jar had the contents and date indelibly etched into the lid for future reference.
I am going to speculate as to why I was recommended against canning, but rather suggested that I freeze the puree. I did a little Googling and found many people detailing how to can a pumpkin puree. However, in each case, they started with a nice light coloured puree and ended up with a much darker coloured one. This makes sense as to properly can something you need to heat it up, to heat it up you enter the realm of "Heat + Food = Cooking". I can only assume that canned purees are cooked purees and frozen ones are uncooked (At least to the extent that it is). I can not speak to the flavour of either, so I am planning on making Pumpkin bread loaves, one from a frozen jar, another I will cook and then make another loaf. I hypothesize that the flavours will be different, but to what extent, well I'll leave that up to the panel of food critics (who ever I can sucker into taste testing) to decide .
Like my Mother, I started making the recipe with double the spices called for, I have gotten some people addicted to its strong flavour, some but not all. I've always used canned Pumpkin Puree though, just like my Mom. However, in the spirit of things (its fall and Pumpkins are readily available) I have decided to make this ingredient as well. In addition to Pumpkin Bread, the puree can also be used in pies, muffins, waffles, ice cream and whatever whacky creation I can come up with.
In the spirit of making too much, I can't actually turn a whole Pumpkin into loaves of bread and pies and whatever else suits my fancy all at once. I needed to preserve some of it for later use. I originally decided I was going to can the puree for future use, a relatively simple process now that I've done it a few times. I checked the Ball Blue Book (an excellent guide to home canning) for the specifics of how to deal with canning the pumpkin. To my amazement, it recommended against canning, but instead suggested either dehydration or freezing. Dehydration didn't sound appealing, so I have chosen to freeze my puree.


I am going to speculate as to why I was recommended against canning, but rather suggested that I freeze the puree. I did a little Googling and found many people detailing how to can a pumpkin puree. However, in each case, they started with a nice light coloured puree and ended up with a much darker coloured one. This makes sense as to properly can something you need to heat it up, to heat it up you enter the realm of "Heat + Food = Cooking". I can only assume that canned purees are cooked purees and frozen ones are uncooked (At least to the extent that it is). I can not speak to the flavour of either, so I am planning on making Pumpkin bread loaves, one from a frozen jar, another I will cook and then make another loaf. I hypothesize that the flavours will be different, but to what extent, well I'll leave that up to the panel of food critics (who ever I can sucker into taste testing) to decide .
Sunday, October 31, 2010
Croutons
First, I must apologize for my lack of postings lately, I don't have a good excuse, so I won't try and make one up. I've been playing this game NetHack and it has consumed a lot of my time, its really addictive. Anyway, I will attempt to set aside the game to post my creations and culinary adventures. I have kept documenting everything, I just haven't been posting.
As always, I have scorned the store bought when I can make a home made version, and in the fashion I do so often, I also avoided store bought ingredients, preferring to make them myself (sadly from store bought base ingredients). So this is actually two stories in one, the story of the French Bread and the story of the Crouton.
This story begins in a land far far away, in a time long forgotten, or rather my kitchen (3 meteres) and two weeks ago. I had made glorious loaves of French Bread, destined to be cubed and made into dry flavored bread known as Croutons.
In times gone by (when I was a child) I didn't like croutons, they were crunchy oddities amongst a bunch of readily chewy salad that was drenched in a salad dressing that I didn't care for to begin with. So as all good stories go, I didn't eat much salad or croutons throughout my teenage years, unless I had to... I was never a fan of adding 50 billion different items to a salad to make it appetizing and then drenching it with salad dressing, I liked simple salads, maybe some iceberg lettuce and some salad dressing; that was it!
About a year ago, I discovered that spinach goes great in a salad, a little bit of iceberg lettuce to give it some diversity and the barest amount of salad dressing I could get away with, and some croutons for some reason. Unlike the soggy ultra-colourful salads of my youth that I didn't much care for, I had a salad that I really enjoyed. The croutons brought new flavour packed cubes that could change the flavour from homogeneous to heterogeneous. Meaning that the salad never got boring, it kept changing between two delicious flavours, ensuring that each time I alternated it was like tasting it for the first time again. I was in salad heaven! I started making lunches out of salads, for awhile people thought I was a vegetarian because I was bringing so many salads for lunch... It wasn't until then that I realized I hadn't disliked the humble crouton, but rather the soggy diverse salads it had been put into.
All of this brings me to the present, when I went to make a salad and I reached into the cupboard where I store the croutons, only to find I had run out and hadn't bothered to tell myself to buy more. I was disheartened, the salad would be able to stand on its own with or without the croutons, but it wouldn't hold the same attraction to me that it had earlier. It was shortly after this that I realized, I was paying money for dry flavoured bread cubes, something that can easily be made in my kitchen. This was a beloved ingredient in my salads that I could make, I would never run out as long as I had the time to make more! A new era had been born!
 I started with a fresh loaf of French Bread, I ended up eating the ones I had made in a previous posting, so I made more and made the loaves with the knowledge I had gained about forming...
 The loaf was cubed and put into a bowl that was much larger than it. This wasn't done to make it look insignificant or because I had misjudged how much a loaf would make, this was to make tossing it easier with the oil and seasonings that I would soon add.
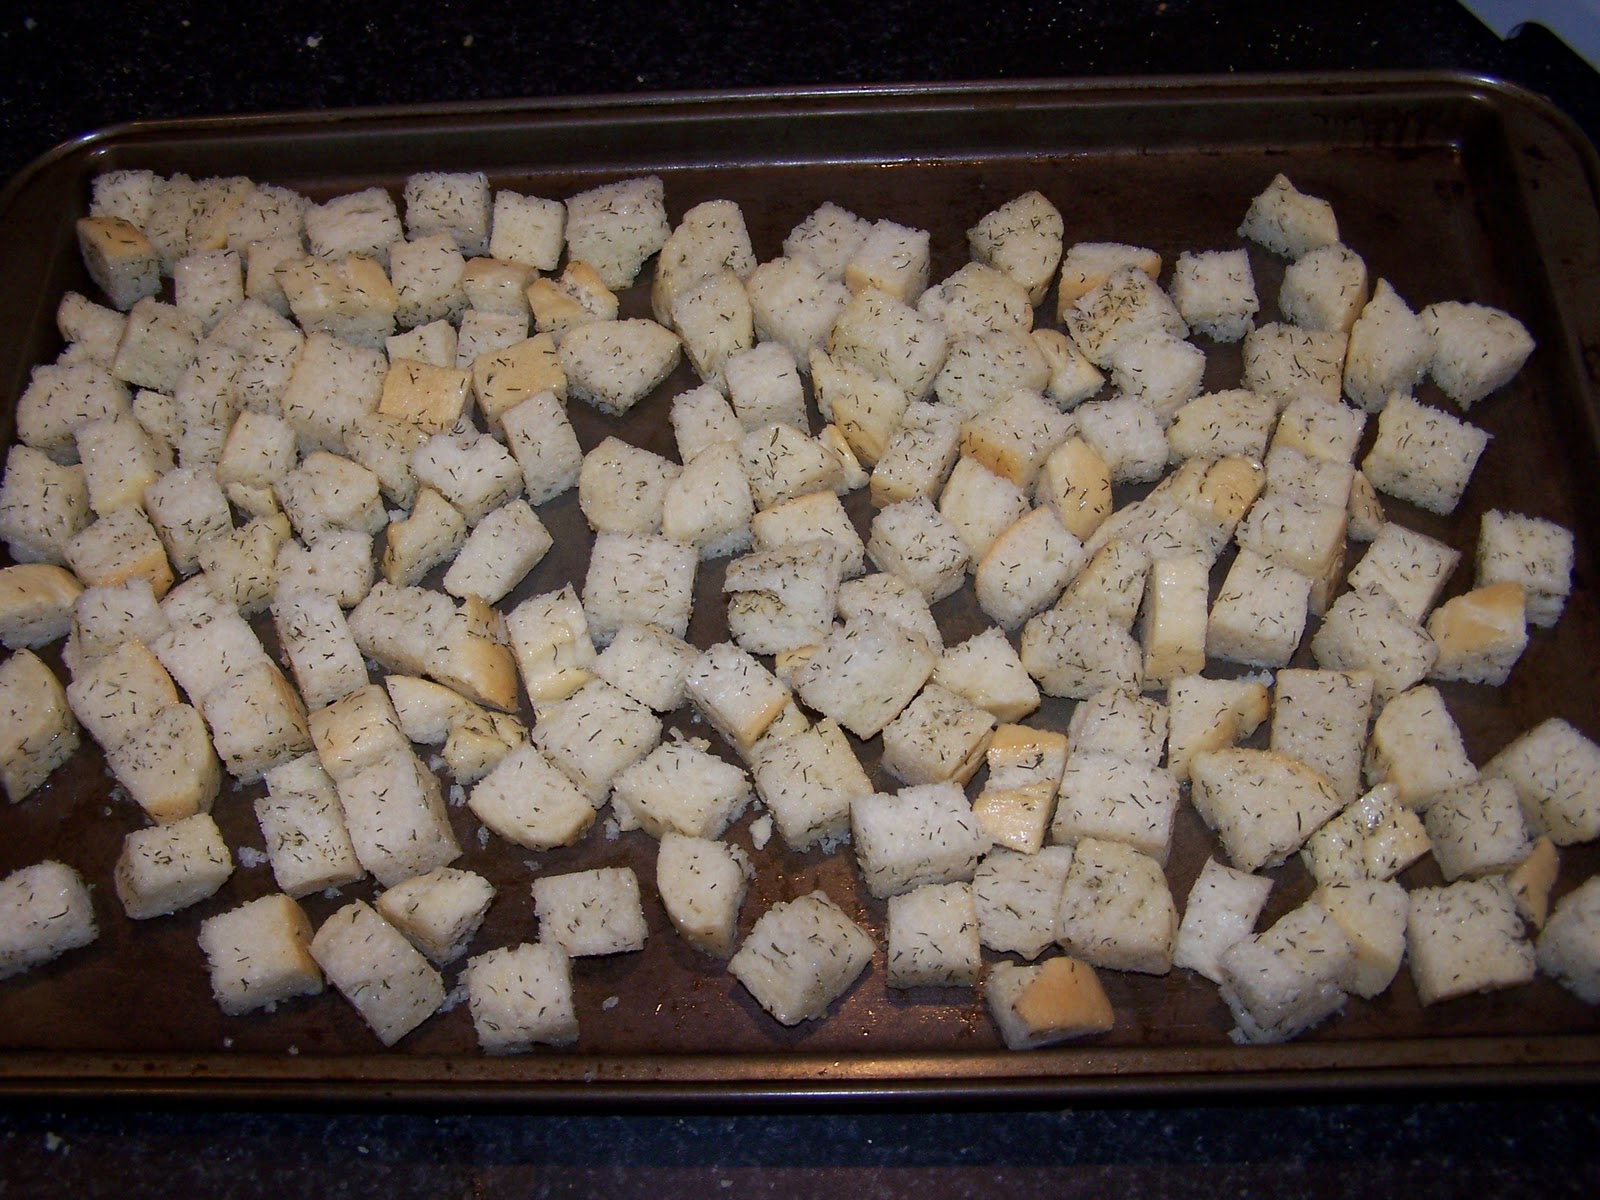
 I sprinkled garlic powder and dill over the bread cubes and then used a pump sprayer filled with Olive Oil as I tossed to evenly coat the cubes with oil. Not too much and not too little. Most importantly, the sprayer ensured that none would be drenched in an excess of oil.
 Once the cubes were coated to what I considered just right, I spread them out onto a baking sheet and stuck it into an oven. I took it out every 5-10 minutes to toss everything so it would brown evenly.
 The end result is delicious dry flavoured bread cubes that I can put into the salads that I love so much. I store them in an air tight ziplock bag in the freezer until I need to call upon there humble powers to elevate a salad to a new level of deliciousness. Also, since having made them, I have found they are a favorite snack of my roommates brother...
As always, I have scorned the store bought when I can make a home made version, and in the fashion I do so often, I also avoided store bought ingredients, preferring to make them myself (sadly from store bought base ingredients). So this is actually two stories in one, the story of the French Bread and the story of the Crouton.
This story begins in a land far far away, in a time long forgotten, or rather my kitchen (3 meteres) and two weeks ago. I had made glorious loaves of French Bread, destined to be cubed and made into dry flavored bread known as Croutons.
In times gone by (when I was a child) I didn't like croutons, they were crunchy oddities amongst a bunch of readily chewy salad that was drenched in a salad dressing that I didn't care for to begin with. So as all good stories go, I didn't eat much salad or croutons throughout my teenage years, unless I had to... I was never a fan of adding 50 billion different items to a salad to make it appetizing and then drenching it with salad dressing, I liked simple salads, maybe some iceberg lettuce and some salad dressing; that was it!
About a year ago, I discovered that spinach goes great in a salad, a little bit of iceberg lettuce to give it some diversity and the barest amount of salad dressing I could get away with, and some croutons for some reason. Unlike the soggy ultra-colourful salads of my youth that I didn't much care for, I had a salad that I really enjoyed. The croutons brought new flavour packed cubes that could change the flavour from homogeneous to heterogeneous. Meaning that the salad never got boring, it kept changing between two delicious flavours, ensuring that each time I alternated it was like tasting it for the first time again. I was in salad heaven! I started making lunches out of salads, for awhile people thought I was a vegetarian because I was bringing so many salads for lunch... It wasn't until then that I realized I hadn't disliked the humble crouton, but rather the soggy diverse salads it had been put into.
All of this brings me to the present, when I went to make a salad and I reached into the cupboard where I store the croutons, only to find I had run out and hadn't bothered to tell myself to buy more. I was disheartened, the salad would be able to stand on its own with or without the croutons, but it wouldn't hold the same attraction to me that it had earlier. It was shortly after this that I realized, I was paying money for dry flavoured bread cubes, something that can easily be made in my kitchen. This was a beloved ingredient in my salads that I could make, I would never run out as long as I had the time to make more! A new era had been born!



Thursday, October 14, 2010
French Bread
I really, really like the taste of this bread, but only when its fresh from the oven. It loses quite a lot of flavour in mere hours after baking, or at least mine does. If timed just right, it comes out of the oven just as a meal starts and takes the whole meal to the next level. The very smell of it baking can help whet the appetite for the meal.
Aside from those obvious benefits, the left over bread as I mentioned is lacking in its original flavour. This makes it a prime candidate for being used as an ingredient in other dishes. Topping an Onion soup, or used as a base to a juicy cut of meat, bread crumbs, or as I am planning on doing with the left overs from this batch, turn it into Croutons.
I learned an interesting lesson when I was rolling the dough into a baguette. I rolled it out, but didn't like it so I folded it in half and rerolled it again. Again, I didn't like the shape, so I did this one more time, now it was in a shape I liked. However, when it baked, all the folding back on itself had not caused it to stick to itself, so I ended up with some pretty funky baguettes. They still came out tasting great, they just didn't look anything like a traditional baguette would.
 I thoroughly mixed the dry ingredients together (Flour, yeast and salt). Once I add the water there won't be any further chances to nicely mix stuff into the dough.
 I mixed the water into the dry mixture until it was all loosely held together in clumps. This part is really sticky, so I used a butter knife to do the mixing. I chose the knife above all other potential tools solely because the knife would be really easy to clean.
 I turned out the clumpy, floury mixture onto a table and set about the task of kneading the dough. A note on the height of the table, if you are kneading, I find it is a lot easier (a lot) if the table is low enough that you can let gravity help you. The table I use is below my belt line, but above my groin. If the table is too high, you end up using your arm muscles, which unless your a body builder, is a hard work out. Your going to be here for about a 1/2 hour, so make it easy on yourself!
 The dough is starting to come together after a few minutes of kneading. If you find the dough is wet and sticky, flour the table and work it into the dough, if it is too dry, you can add some water. However, a little water goes along way, most bread recipes recommend adding water by the teaspoon, I personally either wet my hands and then work it in, or spray with a spray bottle of water. This is a finer grained measurement than a teaspoon and as such allows you to adjust the moisture content very easily, without having to worry about over shooting.
 The final dough is stretchy, and if you want, tastes great. What can I say, I really like bread.
 I boiled a medium pot with some water in it, the exact amount of water is really of little concern. More water acts as a larger heat sink and will hold more heat to be dissipated later. This is a good thing.
 It is a good thing, because it is going to be used to keep the dough warm while it is rising. As a byproduct, it will keep the oven at a high level of humidity. The high humidity means you don't knead (groan) to cover the dough while it is rising. You will be rewarded with a soft and fluffy dough. Keep in mind the oven is off, I'm just using the space to help raise the dough.
 After an hour or when the dough has doubled in bulk, your going to beat on it, punch it and in general have fun with it. What? I enjoy punching down the dough. Try it, I think you'll agree.
 As the mobsters from the Simpsons once said about roughing up Homer "This guys easy on the knuckles, I could work him over all day!". Well the dough is the same weigh (groan). You want to put it back into the oven until it has doubled in bulk again, also reboil the water. When the dough has doubled in bulk again (or an hour has passed) punch the dough down and form into baguettes.
 As I mentioned above I formed then reformed each baguette, I let them sit on a lightly floured surface until they had doubled in bulk again, then I cut slices in the top. The slices serve a double purpose, they help prevent the surface from cracking as it cooks and it looks really nice on the final product.
 The final product, distorted by the refolding of the baguette when I should have left it alone. If I hadn't refolded it, the slices I had made would have made it look really nice. Despite looking like it was the horribly disfigured progeny of a monster, the taste was just as I have always loved. I mostly ate one loaf, before I could take this picture.
The bulk of the cost of both of the loaves was from the flour, which only came to $0.89. Thats $0.46 per loaf or $0.03 per slice. That definitely knocks homemade bread weigh (grown) down from the cost of store bought bread. So if you don't make bread at home for the fresh taste, then you might as well do it to save a few bucks on your grocery bill.
Aside from those obvious benefits, the left over bread as I mentioned is lacking in its original flavour. This makes it a prime candidate for being used as an ingredient in other dishes. Topping an Onion soup, or used as a base to a juicy cut of meat, bread crumbs, or as I am planning on doing with the left overs from this batch, turn it into Croutons.
I learned an interesting lesson when I was rolling the dough into a baguette. I rolled it out, but didn't like it so I folded it in half and rerolled it again. Again, I didn't like the shape, so I did this one more time, now it was in a shape I liked. However, when it baked, all the folding back on itself had not caused it to stick to itself, so I ended up with some pretty funky baguettes. They still came out tasting great, they just didn't look anything like a traditional baguette would.


The bulk of the cost of both of the loaves was from the flour, which only came to $0.89. Thats $0.46 per loaf or $0.03 per slice. That definitely knocks homemade bread weigh (grown) down from the cost of store bought bread. So if you don't make bread at home for the fresh taste, then you might as well do it to save a few bucks on your grocery bill.
Subscribe to:
Posts (Atom)