Showing posts with label Requested. Show all posts

Thursday, November 25, 2010

How to Crack an Egg - Revisited

In response to a post I made awhile back, about how to crack an egg. I have received some comments about how it does not work as I explained. How egg shell still manages to get into the bowl. Thinking about this has made me consider some points. The first being, "did I describe the procedure differently than I actually perform it?", the next being "Or maybe I'm just superbly gifted at cracking eggs!".

Well I analyzed what I had written and compared it with what I do. The two I believe are still compatible, so my problem became, how to I articulate my words to better describe the act of cracking an egg. I've tried words, heck I've tried pictures, which as we all know is worth a thousand words AND is a fact. This led me to the next logical format, video. So, "Behold, my creations!"


First, let me apologize for the stuttering sound in the videos, that is the auto focus doing its bit to be annoying. During the making of the videos, I went through several takes. The problem was not with the actual cracking of the eggs, but rather with holding a video camera AND cracking an egg with both hands, all without the aid of a tripod... I spent way too much time focusing on the camera and not what I was doing in the first two videos and the performance looked terribly amateur, especially since I forgot to turn it off and recorded some extra footage in the first one. The third video was a progression away from that and more towards actually paying attention to what I was doing. The last video (also the only video I'm willing to admit exists, the others are fakes, honestly...) I paid attention entirely to the egg. The theme across all of the videos though, is that of the seven eggs I cracked, not one left any shells in the bowl.

Tuesday, September 7, 2010

Roasted Red Pepper Hummus

A friend of a friend, both of which are friends of mine, requested this for her birthday party. It is the first flavoured Hummus that I have ever made, and I learned a whole bunch about how added flavours interact with the base taste. Namely, I need to add more if I want it to have a distinct flavour!

For those of you who don't know, Hummus has a few different uses. It can be used as a sauce, a spread, and a dip. I've seen it used quite successfully on a vege-burger, though I personally prefer to eat it with assorted crackers.

Depending on what you are using as your base (Garbanzo beans or Chickpeas, dried or canned) you may need to take a few extra steps. I used dried Chickpeas and as such I had to boil them until soft (about 1-2 hours)


The water the Chickpeas were boiled in is saved and used to thin the Hummus when everything is blended together.


While I was letting the Chickpeas cool a little, I roasted some red peppers and coarsely chopped them. In retrospect, I shouldn't have chopped them as the next step was to blend everything in a blender. I could have roasted the pepper and then just tossed it in. It was an unnecessary step that I apologize for.


Blend the Chickpeas, Peppers, and all the other ingredients (Garlic, tahini, lemon juice and cumin). Once pureed, move to a storage or serving container and sprinkle with Paprika. Paprika is typically made from dried and powered red peppers so aside from making it look nice it will also add flavour.


Hummus
About 2 cups
You may substitute one 16-ounce can chickpeas, rinsed and drained. Use water to thin the puree as necessary.
Pick over, rinse and simmer:
3/4 cup dried chickpeas
Drain and place in a pan with water to cover by 5 cm. Bring to a boil, reduce the heat, and simmer until very tender, about 1 1/2 hours. Drain, reserving the cooking liquid. Transfer the chickpeas to a food processor or blender and add:
1/3 cup fresh lemon juice
3 tablespoons tahini (sesame paste)
2 garlic cloves, finely minced
(1/2 teaspoon ground cumin)
salt
Puree until smooth, adding 2 to 3 tablespoons of the cooking liquid as needed to obtain a soft, creamy consistency. transfer to a shallow serving bowl and garnish with:
1 tablespoon olive oil
1 tablespoon finely chopped parsley
Sprinkling of hot or sweet paprika

Unfortunately I don't have a recorded cost for most of the ingredients that I used, so I can't give a cost associated with the final dish. I apologize and I'll keep an eye out for prices so that I can update this post in the future.

However, I do know the ingredients and I have access to Wolfram Alpha, so I can provide the nutritional information. I made the wild assumption that a single serving would be 15 mL or an ample amount to spread on a single cracker.

Thursday, September 2, 2010

Ice Cream Cake

There is something about an ice cream cake that makes me think of birthdays. Maybe its because almost everyone I know celebrates with one, but maybe its just me. Either way, this isn't the first request I've had for an ice cream cake, and I doubt it will be the last.

My sister requested an Ice cream cake for her birthday, she said it had to have a crumb crust, vanilla ice cream and a berry filling. It sounded easy enough, except that I had never done a berry filling in a frozen cake before. I was afraid that I would end up with a solid block of frozen berries that would be hard to eat. I did some experimentation to overcome this, I knew berries by themselves would be as hard as a brick, I also assumed if I used alcohol it would loosen it up at freezing temperatures. I however wasn't sure if sugar would work, so I tossed a half jar of Strawberry Jam into the freezer over night and tested it in the morning. As I hoped, it was thickened, but not solid, perfect for my needs. This meant there was nothing else to do but make the cake itself.

This being a frozen cake, it meant that it took a couple of days too make. Most of the time being spent in the freezer, the actual effort was quite small

The crumb crust is a fairly simple recipe in its own right, consisting mostly of Graham Crumbs held together with butter. Sugar was added to sweeten and Cinnamon to flavour it.


I mixed the ingredients into a coarse mixture.


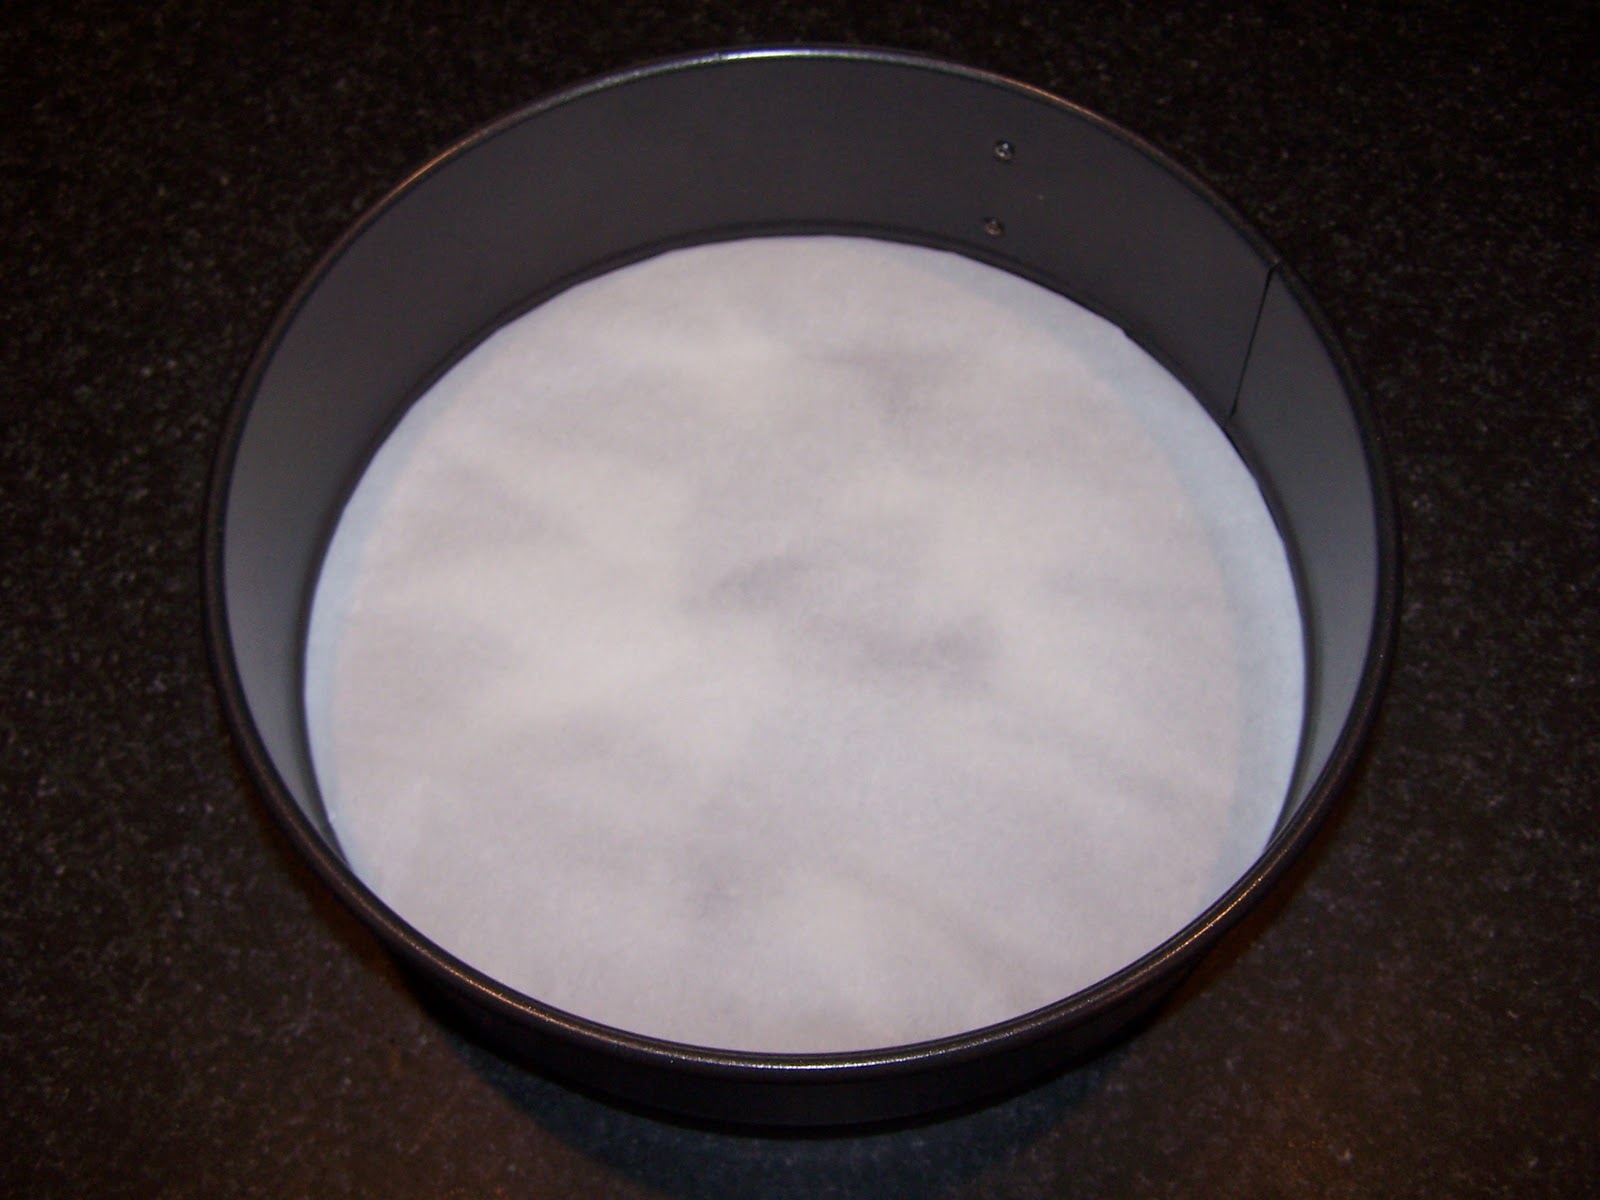
In the past I have found crumb crusts stick very easily to the bottom of my pan. Some people like to grease their pans or dust with a powder (usually powdered sugar or flour) before cooking. Since this is a desert that is high in oils, I opted instead to just put a parchment paper layer down in the bottom of my spring form pan.


I packed the crust down using a spatula to that it would be of even thickness and consistency.


I baked it for 20 minutes, let it cool and then froze it. It is an important step, because you don't want to melt the ice cream when you add it.


I added the Strawberry Jam layer next and smoothed it out so that it would be a consistent thickness. The whole thing went back into the freezer.


I mixed some cream and sugar and brought it just to a simmer before removing from the heat.


Once it came to a simmer, I removed it to a bowl and added some more cream, milk and some Vanilla extract. I had been planning on using a Vanilla Bean instead, but I was apparently out. The resulting mixture was chilled in the refrigerator over night.


I removed the mixture the next day and started it churning in my Ice Cream maker. I ended up with a particularly good consistency this time. I usually have to chill it further once it is done churning to get a scoopable mixture. However, this was ideal for the cake as it was.


I smoothed out the ice cream using a rubber spatula. There was not going to be any icing to make it look pretty, so I quickly leveled it by scraping to the center; this gave it the pleasing spiral look. I had to work fast so that the ice cream wouldn't melt. Once I was done it went straight back into the freezer until I was ready to serve it.


Crumb Crust
One 9- or 10-inch single piecrust and topping
Put in a bowl, reserving a tablespoon or two for topping, if desired:
1 1/2 cups fine graham cracker, vanilla or chocolate wafer, or gingersnap crumbs
Add and stir until well blended:
1/4 to 1/2 cup sugar, depending on sweetness of cookies
6 tablespoons (3/4 stick) unsalted butter, melted and cooled

(1 teaspoon ground cinnamon)
Bake for 10-12 minutes at 350 for a baked crust

Strawberry Jam
1 cup jam

Vanilla Ice Cream
1 quart
Combine in a medium saucepan
1 Cup heavy cream
3/4 cup sugar
1/8 teaspoon salt
Split lengthwise in half:
(1 vanilla bean)
 Scrape the seeds into the cream mixture, then add the bean. Bring to a simmer over medium-low heat, stirring to dissolve the sugar. Pour into a bowl and stir in:
2 Cups heavy cream
1 cup whole milk
1 1/2 to 2 teaspoons vanilla (if not using vanilla bean)
Refrigerate until cold, overnight if possible. Remove the vanilla bean, if used, pour the mixture into an ice cream maker and freeze as directed.

In addition to the cost analysis that I usually do, I also did a nutritional analysis using Wolfram Alpha. I summed the bulk of the ingredients and divided by eight servings. It then generated this nutrition label and other useful information. I was surprised at the results, but considering the ingredients, I am inclined to believe the numbers.

The total cost of the cake was $4.48, I worked it out to a total of eight serving at $0.56 per piece of cake.

Tuesday, August 31, 2010

Waffles

Since I posted about the Waffle Day, I might as well post about how to make waffles. Unlike most other dishes, you need a specialty item if you want to make them. It's really hard to kludge together a waffle iron, so I would not recommend trying. However, from personal experience, I would recommend getting a good waffle iron if you want to enjoy making waffles often. I have have found the cheaper models have timers that should be ignored, this will lead to a non-soggy waffle, fully cooked result.

If you are stuck with a cheap model that doesn't do quite a good job, or the timer doesn't work well. You are in luck, you can wait until the steam mostly stops coming out of the iron as the waffle cooks, this means the waffle is done. It may not be nice and crispy, but it definitely won't be soggy or uncooked.

 Thoroughly mix all the dry ingredients together.


In a separate bowl, mix the wet ingredients. I try to melt the butter so that it is liquid but not hot. Once I have added the butter to the rest of the liquid ingredients, I constantly stir so that the butter doesn't separate. This will ensure that the butter is evenly distributed throughout the final batter.


Mix the wet ingredients into the dry ingredients until just mixed, ignoring any lumps. You do not want to over blend in this stage, that only leads to a tougher waffle. You can use the batter right away or let it sit until ready to use. I usually let it sit for a few hours, covered in the refrigerator before using; just as I would for pancakes. This give the batter time to fully hydrate the flour.


Depending on your iron, ladle about a 1/2 cup of batter into the center. Too much and it will over flow the sides and make a mess, too little and you won't have a fully developed waffle. Experience is the greatest teacher here as every iron is different. Waffles can be kept warm in an oven set at 200 F until you are ready to serve them, or they can be enjoyed the instant they are done.


Waffles
About 6 waffles
Preheat a waffle iron. Whisk together in a large bowl:
1 3/4 cups all-purpose flour
1 tablespoon baking powder
1 tablespoon sugar
1/2 teaspoon salt
Thoroughly blend in another bowl:
3 eggs
1/4 cup to 1 cup (1/2 to 2 sticks) butter, melted
1 1/2 cups milk
Make a well in the center of the dry ingredients and pour in the wet ingredients. Combine with a few swift strokes of the whisk. If desired gently stir in any additions (eg Blueberries)
To cook, follow the waffle maker manufactures instructions.

Depending on if you made the recipe with the low amount of butter or high amount it will change the price from $2.14 to $4.28, this works out to $0.36 and upwards of $0.72 per individual waffle. Topping and extras like berries are not factored in.

Friday, August 20, 2010

Waffle Day

On an unrelated note, or maybe semi-related at any rate. Today I successfully pulled off the second Waffle Day at work. I brought in both of my waffle irons (twice as many irons as the first Waffle Day) along with a double batch of waffle batter from the The Joy of Cooking.

I had collected three other coworkers and we had agreed on a date to have the Waffle Day. I agreed to bring the irons and the batter as long as each of them brought a topping of some sort to put on the waffles. In theory this should have worked, but only one coworkers actually brought a topping (Aunt Jemima's). However, I brought some Strawberry/Raspberry Jam. Partially with the foresight that someone would forget, and partially because its really good jam!

I think the Waffle Day is starting to catch on and we will likely see more of them in the future.

Thursday, August 19, 2010

Chicken Korma

A request was made of me to make a Chicken Korma. After some searching on the Internet to find out what that was and what it entailed, I found this recipe. It called for two ingredients that I didn't have but that I could easily make, they were 1/4 of tomatoe sauce and 1 cup of chicken broth.

I really enjoyed making the Korma, though there are a few things I would do differently next time. Firstly my wok is not in the best shape, and doesn't sit flush with the stove top (repeated abuse over the years).  So instead I would use a large pot with an appropriately sized lid. Second, I would use whole bay leaves as opposed to the crumbled ones I have, they didn't break down and were annoying when encountered while eating it. The flavour was good but the downsides detracted from my enjoyment of the meal. Lastly, I would grind the coriander in a pepper mill and find a better way of pasting the ginger and garlic together. A mortar and pestle, while doing the job admirably well, was time consuming and the coriander didn't grind down as fine as I would have enjoyed.


While not necessary, I layed everything out next to the wok, so that as I needed an ingredient it was ready to go. In timing dependent cooking this is a very good idea and a habit I am trying to get into. This will increase the prep time, but will greatly simplify the cooking time. Everything is close to the point of use and is organized in such a manner that as I use the item, the next item I am going to use is right there.

All in all, as far as curried dishes go, I really enjoyed this one. The flavours weren`t too strong, nor too mild. The consistency was on par with what I have come to expect from curried dishes. I haven`t seen to many recipes call for cream and yogurt as opposed to coconut milk, so I was kind of wary at first as to how the dish would turn out.

Cashews - 30 g
Ginger - 16 g
Garlic - 10 g
Onion - 157 g
Spices - 8 g (The spice must flow)
Tomatoe Sauce - 74 g
Chicken Broth - 166 g
Chicken - 545 g

I gathered all of the ingredients into one location prior to making the dish. The idea is I will be using ingredients from left to right and closest to furthest from me. The cashews were placed into the boiling water just before this picture was taken. This allows me to concentrate on the actual cooking instead of constantly referring to a recipe to find out what to do next. That is not to say I didn't have a recipe on hand to guide me through the steps, just that it isn't as critical that it be there. This is in addition to reviewing the recipe so I know what to expect and when to expect it. There is nothing worse than following a recipe and discovering a surprise you didn't see on the first read through.


I added some oil into the preheated wok along with some crumpled bay leaves. As I mentioned above, use whole bay leaves! This allows you to remove them when the meal is done. Into the oil went the onions, stirring every so often.


After the onions have softened and changed colour, I added the ginger/garlic paste and spices. I know, this picture is really unappetizing, but trust me it gets better!


Next I added the chicken, cooking and stirring for roughly 5 minutes.

I mixed in the tomatoe sauce and chicken broth at this point, covered the wok and let it simmer for 15 minutes. I made sure to stir every so often.
The cashew, cream and yogurt mixture was added last and again allowed to simmer for another 15 minutes. Before taking the Korma off of the heat, I added the cornstarch mixture and allowed it to thicken. I ended up using four times as much cornstarch as the recipe called for until the Korma came to a consistency that I was happy with.
Served on a bed of brown rice. This was a really tasty meal and I will definitely do this again in the future.


Chicken Korma
1 Liter
Heat in a medium sized pot for 30 seconds over medium heat:
3 tablespoons vegetable oil
2 whole bay leaves
Stir in:
1 large minced Onion
Cook until the onion is soft. In a separate container, combine and set aside:
1/4 cup of boiling water
1/4 cup of cashews
Make a paste in a food processor or blender:
3 cloves of garlic, peeled
1/2 of peeled ginger
Add the paste to the onions. Also add:
1 teaspoon Coriander 
1 teaspoon Garam masala 
1 teaspoon Cumin
1 teaspoon Turmeric
1 teaspoon Chili powder
1 1/2 cubed Chicken breasts
Cook for 5 minutes. Add:
1/4 cup tomatoe sauce
1 cup chicken broth
Reduce the heat, cover and simmer for 15 minutes, stirring occasionally. In another container, blend together:
1/2 cup whipping cream
1/2 plain yogurt
Cashew and water mixture
Stir the mixture into the wok, continue simmering for another 15 minutes. Mix and add:
1 1/2 tablespoons cornstarch
1 1/2 tablespoons cold water
Cook for another minute or until the sauce thickens. Serve on a bead of rice.

The resulting dish measured in as 1 liter by 989 grams, which works out to enough to feed 3-4 people. The total cost of the ingredients was $5.32, this means that it is $1.33 per serving. The price did not include the cost of the rice.