Thursday, November 25, 2010

How to Crack an Egg - Revisited

In response to a post I made awhile back, about how to crack an egg. I have received some comments about how it does not work as I explained. How egg shell still manages to get into the bowl. Thinking about this has made me consider some points. The first being, "did I describe the procedure differently than I actually perform it?", the next being "Or maybe I'm just superbly gifted at cracking eggs!".

Well I analyzed what I had written and compared it with what I do. The two I believe are still compatible, so my problem became, how to I articulate my words to better describe the act of cracking an egg. I've tried words, heck I've tried pictures, which as we all know is worth a thousand words AND is a fact. This led me to the next logical format, video. So, "Behold, my creations!"


First, let me apologize for the stuttering sound in the videos, that is the auto focus doing its bit to be annoying. During the making of the videos, I went through several takes. The problem was not with the actual cracking of the eggs, but rather with holding a video camera AND cracking an egg with both hands, all without the aid of a tripod... I spent way too much time focusing on the camera and not what I was doing in the first two videos and the performance looked terribly amateur, especially since I forgot to turn it off and recorded some extra footage in the first one. The third video was a progression away from that and more towards actually paying attention to what I was doing. The last video (also the only video I'm willing to admit exists, the others are fakes, honestly...) I paid attention entirely to the egg. The theme across all of the videos though, is that of the seven eggs I cracked, not one left any shells in the bowl.

Wednesday, November 17, 2010

Juicing Citrus Fruit

In the past I have heard that microwaving a citrus fruit before juicing would allow you to get more juice out of it. After a little research, I found a plausible explanation for this, the microwaves break down the cell membranes so that the juices are able to flow more freely. I accepted this as fact until I read elsewhere that warming the fruit in the oven for a few minutes would have the same effect.

This made me suspicious, maybe it wasn't the breaking down of the cell walls, but rather, just the heat was somehow releasing the juices. All of this started to make me think, the information on the internet was sketchy, only claiming I would get more juice, never how it worked or even how much more I would get.

At this point, I realized that I would be hard pressed to discover how it worked on my own, so that question is still somewhat of a mystery to me. However, testing to see how much more juice I could get was a very easy and simple process.

For the purposes of this experiment I did not try the oven method, only because the information I could find on it said it took a few minutes, where as the microwave would take a few seconds. As such, if the microwave method worked, I would never bother with the oven method, only because it takes so much longer.

 For this experiment, I gathered two fine citrus specimens (I had planned on adding a Grapefruit and Lime to the line up, but I didn't really want their juices). I am going to talk about the steps I took on the Lemon, they were the same for the Orange, I just didn't photo document it.

 I tried to split the Lemon lengthwise so that each half weighed exactly the same. I came pretty close on the Lemon and almost exactly on the Orange, so I believe it is safe to say I succeeded. I then subjected one half of the Lemon to 10 seconds on Hi in the microwave. I haven't tested with other powers and time spans. I may do this in the future, but I have no plans to do so. The other half I did nothing too.

I don't have a citrus fruit juicer, so I used the next best thing, the back side of a spoon to juice both halves into pre-weighed custard cups. Using the tare option of my scale, I was able to measure the weight difference between the juice/pulp/seeds of each method. I then strained the juice and measured it separately. The results are shown below.


Lemon
    Initial Weight of the full Lemon = 172 g
    Microwaved half weighed = 79 g, the Juice and Pulp weighed = 30 g, the Juice alone weighed = 24 g
    Traditional half weighed = 92 g, the Juice and Pulp weighed = 33 g, the Juice alone weighed = 22 g
     
        Orange
        Initial Weight of the full Orange = 188 g
        Microwaved half weighed = 93 g, the Juice and Pulp weighed = 52 g, the Juice alone weighed = 18 g
        Traditional half weighed = 94 g, the Juice and Pulp weighed = 52, the Juice alone weighed = 13 g
         
        To break it down, when I Microwaved the Lemon, I was able to get 30.3% by weight as juice, compared to 23.9% when juiced with nothing special done to it. That is an improvement of 6.4% of juice from a Lemon, by microwaving the Lemon for only 10 seconds. Again, I haven't tried other power levels or time spans, so it may get better, or it may get worse. All I can say is that for a Lemon placed in a microwave for 10 seconds on Hi, you can expect to see a 6.4% increase in the volume of juice produced.


      As for the Orange, the Microwaved half came out to 19.4% juice and the Traditional method produced 13.8%. Again a net benefit, albeit only a 5.6% increase. As I mentioned with the Lemons, all we can conclude is that you can get more juice my microwaving on Hi for 10 seconds.

      The next logical step would be to test multiple power levels and time spans to determine the optimal time and power level to get the most juice from the citrus fruits. You would need multiple samples at each level to create a proper statistical model for this to work. This is my science disclaimer.
         
        On another note, from the small sample I had, I noticed that the juice weighed 1 gram per 1 milliliter roughly.

      Saturday, November 6, 2010

      Pumpkin Seeds

      Ah yes the humble Pumpkin seed, as far as my history with pumpkin seeds go, I really didn't like them. They were kind of bland tasting and it was like eating little twigs that splintered and got stuck in my teeth. I could only eat one or two before giving up hopelessly as to what other people found to be so great about them. Sunflower seeds on the other hand were more my thing, but even then they had to be shelled before eaten, the pumpkin seed has no easy way of easily shedding its splintery exterior to reveal its flavourful insides to the eagerly awaiting tongue for its delightful flavour. Instead, it sits there, the entirety of its beautiful essence locked away by a barbaric exterior, one that has set up its woody palisade to protect its hidden wonders. Never letting its walls fall for even a second to let me a poor humble petitioner to enjoy the secrets locked within.

      Well, I am sad to say, so to have I failed to bring the Pumpkin seed  into a realm into which I may enjoy it. The ones I made are still, just as the ones on the market, not enjoyable. However, I was given a complement on them by someone who does enjoy pumpkin seeds, so maybe it is just me who can't enjoy them.

      As you all remember, in my last post, I made a Pumpkin Puree out of a whole Pumpkin. I had promised to make a pumpkin bread using both cooked and uncooked puree, that is still in the planning. But at the same time I mentioned that I was soaking the pumpkin seeds in a salt water solution overnight.

       I drained them and spread them out on my custom made non-stick baking sheet (more on that at another time). At this point I still had not cleaned them of the stringy bits that they were webbed in, inside the pumpkin. The soaking had remove most of what had still clung to them. After toasting them at a low oven temperature, the rest fell off. Because they were still wet when I put them on the baking tray, it took a little longer for them to start toasting, but once all the water was gone, they proceeded to toast fairly quickly.

      The final product, a bowlful of lightly salted pumpkin seeds, delicious in every way except for eating. Ok that's a lie, but it is hard work to shell them, so it is slow going but still enjoyable once the shell is gone.

      Wednesday, November 3, 2010

      Pumpkin Puree

      Unlike most children, when I was growing up my Mother did not make Banana Bread for me (unlike all the other kids whose mothers made it for them). Instead my Mom made me something even better, she made Pumpkin Bread. Her recipe, resulted in a very strong flavour, partly, ok entirely because she had doubled the amount of spices the original recipe had called for. For my peers it was way to strong of a taste, but for me, I loved it, I reveled in its flavour. The taste of a single bite always brings warm happy memories.

      Like my Mother, I started making the recipe with double the spices called for, I have gotten some people addicted to its strong flavour, some but not all. I've always used canned Pumpkin Puree though, just like my Mom. However, in the spirit of things (its fall and Pumpkins are readily available) I have decided to make this ingredient as well. In addition to Pumpkin Bread, the puree can also be used in pies, muffins, waffles, ice cream and whatever whacky creation I can come up with.

      In the spirit of making too much, I can't actually turn a whole Pumpkin into loaves of bread and pies and whatever else suits my fancy all at once. I needed to preserve some of it for later use. I originally decided I was going to can the puree for future use, a relatively simple process now that I've done it a few times. I checked the Ball Blue Book (an excellent guide to home canning) for the specifics of how to deal with canning the pumpkin. To my amazement, it recommended against canning, but instead suggested either dehydration or freezing. Dehydration didn't sound appealing, so I have chosen to freeze my puree.

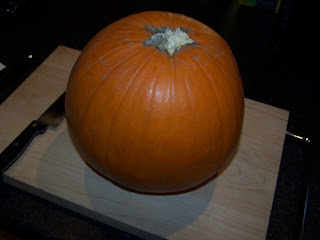
       It all began with a pumpkin, there was nothing terribly special about this one, but its mine so I value it more than other pumpkins. I had plans to carve it for Halloween and then turn it into a puree. However I ran out of time and was unable to carve it, that didn't stop me from pureeing it though.
       I started by cutting the pumpkin in half, collecting the seeds and chucking the fibrous strands inside. I set the bowl of seeds off to the side in salt water. The seeds will sit over night and be toasted tomorrow. I hadn't planned on making salted toasted pumpkin seeds, that is until I realized just how many seeds were in a pumpkin (way more than I thought).

       After cooking the shell for almost an hour and a half, I was able to remove the pulp from the skin and puree it with some sugar. It was a messy job, but as I worked I came up with techniques to help the work go faster.

      If I had been planning on canning the puree I would have put more effort into sterilizing the jars. But since I'm freezing them, I just washed them out with warm water. Each jar had the contents and date indelibly etched into the lid for future reference.


      I am going to speculate as to why I was recommended against canning, but rather suggested that I freeze the puree. I did a little Googling and found many people detailing how to can a pumpkin puree. However, in each case, they started with a nice light coloured puree and ended up with a much darker coloured one. This makes sense as to properly can something you need to heat it up, to heat it up you enter the realm of "Heat + Food = Cooking". I can only assume that canned purees are cooked purees and frozen ones are uncooked (At least to the extent that it is). I can not speak to the flavour of either, so I am planning on making Pumpkin bread loaves, one from a frozen jar, another I will cook and then make another loaf. I hypothesize that the flavours will be different, but to what extent, well I'll leave that up to the panel of food critics (who ever I can sucker into taste testing) to decide .